 A Proud Canadian Company
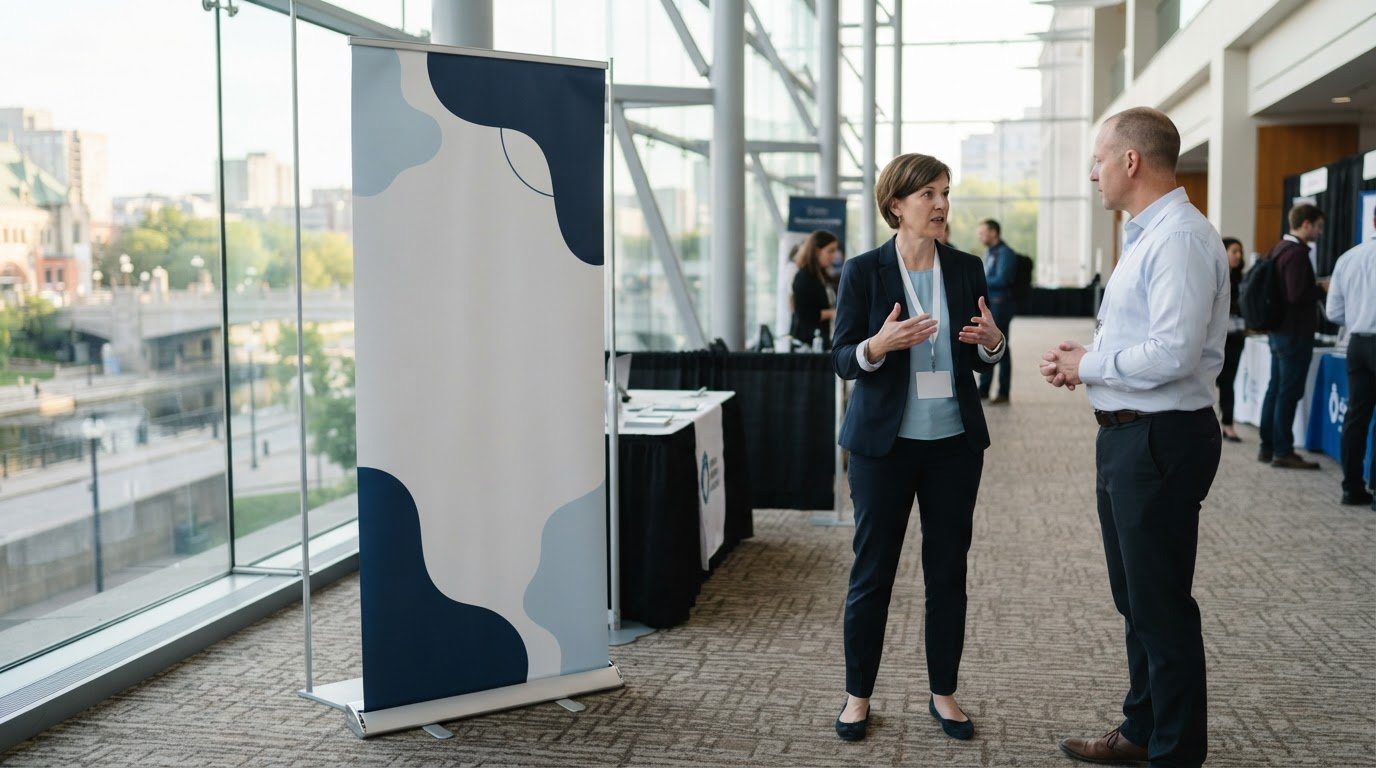
A standard roll-up banner can typically be set up in under two minutes. Place the base on a stable surface, connect the support pole, then lift the graphic from its cassette and secure it to the pole. For retractable banners for conferences, a clear message and a size suited to your space matter just as much as quick setup.
It’s easy to focus on getting a display upright before the doors open. But a banner also needs to help the right people notice your organization, understand what you offer and find you on a busy conference floor.
This guide explains how to assemble a pull-up display, choose dimensions and materials, and position it for a conference or trade show. You’ll also learn how to shape the message for your audience, whether you’re welcoming attendees at a booth, directing visitors to a meeting area or introducing a service at a presentation. The result is a display that’s practical to transport, straightforward to set up and matched to the people you want to reach.
Key Takeaways
- Assemble a pull-up display by setting its base on a stable surface, connecting the support pole and securing the raised graphic.
- Make the banner easy to scan with a prominent headline, clear message and uncluttered layout.
- Match the display to your booth footprint: a stand suits focused messaging, while a full-width backdrop may better fill a 10-foot space.
- Compare banner width, height and material with the venue, viewing distance and how you’ll transport the display.
- Choose placements and messages around the people you want to reach, from booth visitors to attendees looking for a meeting or presentation area.
How do I set up and assemble my retractable banner?
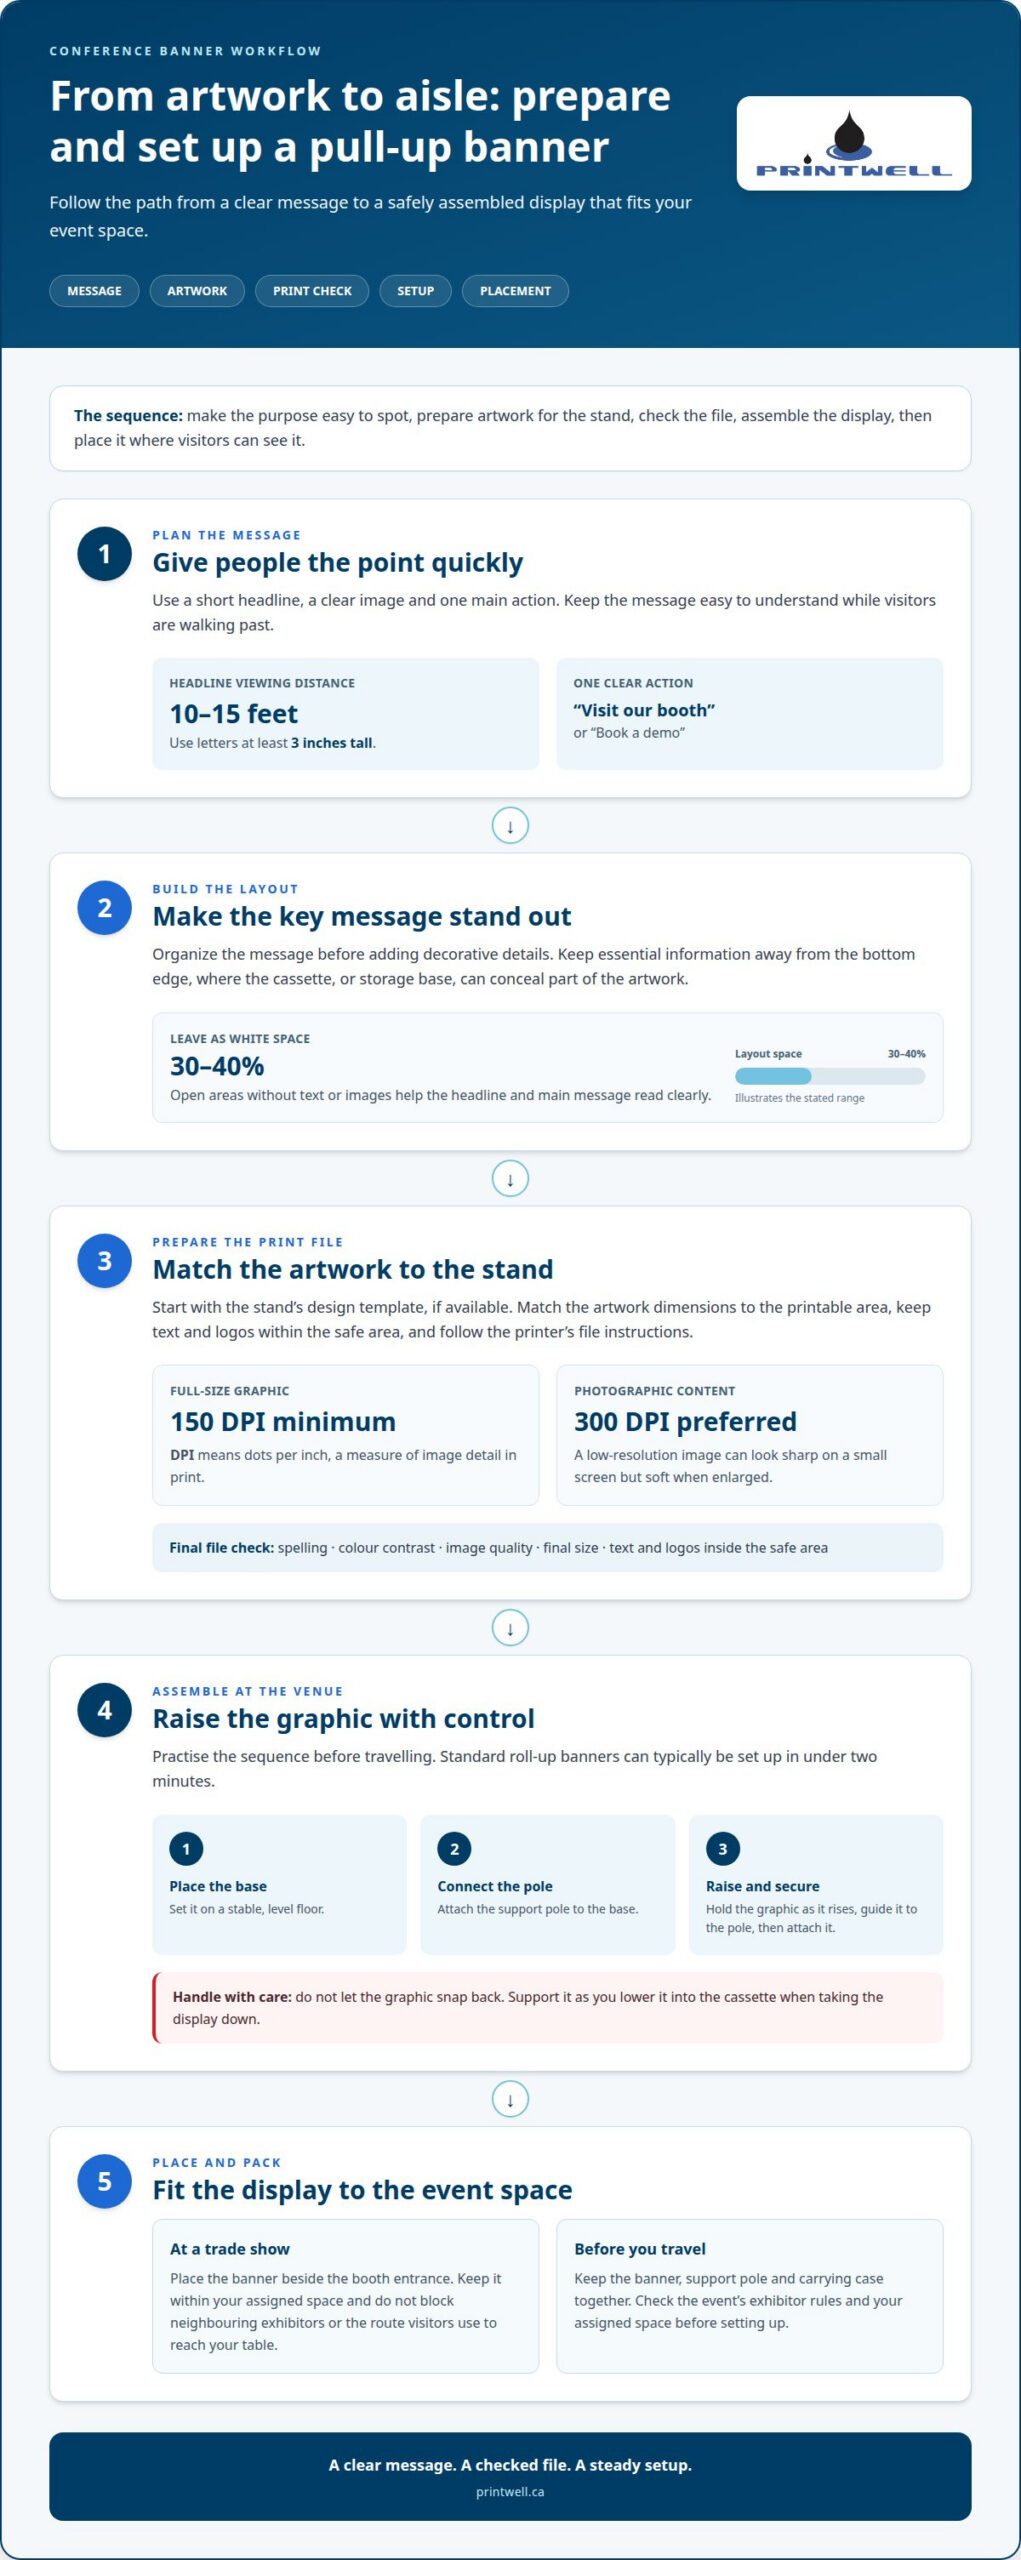
To set up a retractable banner, place the base on a level floor, connect the support pole, then raise and attach the graphic. Standard roll-up banners can typically be set up in under two minutes. Practise the sequence before travelling, and keep the banner, pole and carrying case together.
For safe handling, hold the graphic as it rises from the base. Guide it towards the pole rather than letting it snap back. When dismantling, support the graphic as you lower it into the cassette. Retractable banner stands have a spring-loaded mechanism inside the base that stores the graphic when packed away.
Design for the viewing distance. A main headline should be readable from 10 to 15 feet away, with letters at least 3 inches tall. Use a short headline, a clear image and one main action, such as “Visit our booth” or “Book a demo.” Keep essential details away from the bottom edge, where the cassette can conceal part of the artwork.
Use the 3-30-3 rule to plan the content: capture attention in 3 seconds, communicate the core value in 30 seconds, and offer further details for interested prospects in 3 minutes. Leave 30 to 40 percent of the layout as white space, meaning open areas without text or images. This breathing room helps visitors find the headline and key message quickly.
For image quality, prepare graphics at a minimum of 150 DPI at full size. DPI means dots per inch, a measure of image detail in print. For photographic content, 300 DPI is preferred. A low-resolution image may look sharp on a small screen but appear soft when enlarged across a banner.
Start with the banner stand’s design template, if available. A template shows the printable area and edges. Match the artwork dimensions to the stand, keep text and logos within the safe area, and follow the printer’s file instructions. Before uploading, check spelling, colour contrast, image quality and final size. Organize the message before choosing decorative details. Conference visitors should spot the purpose first.
In Canada, the cost of retractable banners depends on the stand, print, material and order configuration. Canadian commercial print shops and online print providers offer banner printing with shipping.
What Are Pull-Up Display Banners?
A pull-up banner stores its printed graphic inside a base for transport. At the venue, the graphic rises and attaches to a support pole. This compact setup suits indoor displays where a team needs a clear message without assembling a larger booth. The stand is the frame and base that hold the banner upright.
Standard full-height models commonly reach 78-80 inches high. Many stands use a three-piece bungee pole system, meaning the pole sections connect through an elastic cord. A carrying case keeps the base, pole and graphic together between events. This makes the display portable, but the base still needs a stable spot on the floor.
Choose a stand based on the space and the direction visitors approach from. A single-sided banner communicates towards one main aisle or entrance. A double-sided stand can provide visibility from 360 degrees, making it useful where visitors walk around the display. For outdoor use, some retractable displays are rated for wind resistance up to 30 mph. Retract them during strong wind.
A pull-up stand is not the same as a full booth display. For a 10-foot booth space, a full seamless 10-foot backdrop may serve better than one narrow stand. It can create a continuous background, while a retractable banner is easier to place beside a registration table, speaking area or product display. Consider how much of the booth needs to communicate your message.
Compared with pop-up displays, pull-up banners use a compact base-and-pole setup and are simpler to position. Pop-up displays typically create a broader booth backdrop, while fabric banners use a textile graphic supported by a frame or hanging system. Choose based on footprint, setup needs and whether the message must face one direction or several.
Before ordering, compare the finished size, print material, artwork setup and shipping timeline with your event schedule. One listed economy display, 24 inches wide, ships within 4 days. Premium retractable stands can include lifetime warranties on hardware components. Read the warranty coverage closely: hardware coverage concerns the stand components, not necessarily the printed graphic.
Check that the chosen stand fits the venue and that its carrying case suits your transport plans. Confirm the artwork matches the stand’s printable area, and review the final proof for spelling, colour and placement. These checks help prevent a mismatch between graphic and base. For an event message that needs a printed display, explore printed signs and banners.
Retractable banner use at trade shows and conferences
At a trade show, retractable banners for conferences can introduce your organization before visitors reach the booth. Use one to make a service name, product launch or event theme easy to spot. Strong branding connects the display with staff clothing, handouts and promotional materials. Choose wording visitors can understand while walking past, not a paragraph they need to stop and read.
There’s no single rule for every Canadian conference venue. Whether a retractable banner is allowed depends on the event’s exhibitor rules and your assigned space. Read the exhibitor manual, then keep the stand within your booth footprint. Don’t block neighbouring exhibitors or the route visitors use to approach your table.
Placement shapes what people notice. At a trade show, position the banner beside the booth entrance, where it can guide visitors without hiding staff or products. At a conference, signage outside a meeting or presentation area can identify the room and show who the session is for. For example, “Small Business Tax Workshop” gives attendees a quick reason to stop.
Use complementary displays when one banner cannot do every job. A table display can hold brochures or samples, while a banner carries the main message at eye level. A second stand can introduce another service or direct visitors to a demonstration. Keep each display focused. If several pieces compete for attention, visitors may miss the main message.
Conference and trade-show uses vary with the audience. A software company might highlight a product demonstration; a non-profit could explain a campaign or invite people to volunteer. At a professional conference, a speaker can use a banner to identify a session area. At a hiring event, an employer can list open roles and direct attendees to staff.
Plan the layout before the event. First, identify the visitor’s next step, such as entering a booth, attending a talk or asking about a service. Then choose a location where the banner supports that action. Check the view from the main aisle and nearby tables. Retractable banners for conferences should be visible from the routes attendees actually use.
Use the same colours, logo and service names across your banner and other event materials. For example, matching a banner headline to a brochure makes the message easier to recognize after a conversation. Keep the display relevant to the event, too. A home renovation trade show needs different examples and wording from a health professionals’ conference.
Banner dimensions and material
Start with the floor space and viewing direction. Standard retractable banner stands are commonly about 33 inches wide, with heights of 79 or 81 inches. That format gives a tall, narrow surface for a headline, image and supporting message. Measure the assigned booth area before choosing a stand, especially when tables or product displays share the same footprint.
Standard-width stands range from 23.5 to 33.5 inches wide. A narrower option can fit beside a reception table or inside a compact retail display. Wider models, from 47 to 60 inches, offer more room for graphics and brand details. Choose the smallest width that still lets visitors understand the message at the expected viewing distance.
Tabletop retractable banners range from 11 by 17 inches to 16 by 24 inches. They suit a registration desk, counter or product table where a floor stand would take up useful space. Their smaller surface works best for one short message, such as an event name or product feature. Avoid shrinking a full-size layout onto a tabletop display.
Material affects the banner’s appearance and handling. Vinyl banner material is described at 13 to 15 ounces. That weight gives you a useful point of comparison when reviewing material options, but weight alone doesn’t determine the best choice. Consider the display location, how often it will travel and the finish you want for the printed graphics.
For transport, consider the packed stand as well as its open dimensions. A 60-inch-wide display needs more room than a 33-inch model, both at the venue and in the vehicle. Check that the stand, graphic and carrying case can travel together. A compact option may be easier to move between events, while a wider display provides more design space.
Before printing, match the artwork to the exact stand dimensions. A 33-inch-wide graphic won’t fit correctly on every base, even if both are called standard width. Ask the print provider for the template, which marks the printable area and any hidden edges. Keep logos and essential text within the visible area, then review a proof at full size.
Think about the full event setup. For example, a 33-inch floor banner can carry the main message, while a tabletop display gives visitors a closer detail. Use consistent colours and type across both pieces. This keeps the appearance coordinated without crowding one graphic with every service, product and contact detail.
Target customers for pull-up banners
A pull-up banner suits organizations that need a focused message in a shared space. An Ottawa business can introduce its services at a conference, while a community group can explain a program at an information table. Ask yourself: who should notice the display, and what should they understand next?
Corporate teams can use one banner to support a product launch, recruiting event or staff presentation. For example, a hiring team might feature the roles it’s filling and direct candidates to speak with a representative. A custom message works best when it reflects the audience’s needs, not every detail the organization wants to share.
Retail environments call for a different approach. A shop can use a pull-up display to announce seasonal hours, introduce a service or guide customers to a featured area. Keep the message useful at the point of decision. “Ask us about gift wrapping” gives a shopper a clear next step, while a broad slogan may not.
Non-profits, schools and municipal programs can use banners to make information easier to find. A school might identify a registration desk, while a charity could invite visitors to learn about volunteering. At a public event, use familiar words and a visible organization name so visitors know where the information comes from.
Event organizers can also use pull-up displays for wayfinding. A banner outside a workshop can name the session, speaker or intended audience. For example, “Newcomer Employment Q&A” quickly signals that the session may interest attendees. Place each sign where people must choose between routes or rooms.
Think about reuse before settling on one message. A corporate display used at several events needs wording that stays relevant across venues. A campaign banner for a single fundraiser can be more specific. If the stand will travel repeatedly, consider how often it will be packed, moved and displayed.
To choose well, write down the audience, the event setting and the desired action. Then select a message that connects all three. A small business speaking to retailers may invite visitors to view a product range; a professional association may direct members to a session. Plan an event display for your audience around that clear purpose.
Printwell Canada: Custom T-Shirts
Printwell Canada can outfit your event team with custom T-shirts and custom hats. Matching staff apparel to a banner’s colours or event theme makes your booth easier to recognize and gives visitors a clear point of contact.
For a coordinated event look, consider embroidered hoodies for cooler venues or DTF stickers and films for branded items. These products complement a pull-up display but serve a different purpose: the banner shares your message, while apparel helps identify your team.
If staff visibility matters as much as the display, explore Printwell Canada’s custom apparel online or visit the showroom at St. Laurent Shopping Centre in Ottawa.
Make Your Next Event Display Count
Before your next event, decide what visitors should remember after they leave your display. Build the message around that outcome, then make sure your team can carry it into conversations, handouts and follow-up. A well-planned set of retractable banners for conferences can support a consistent event presence, especially when each display has a clear role rather than competing for attention.
Give one person responsibility for the final artwork, event details and packing plan. That handoff helps keep the display aligned with the event, from preparation through teardown. After the event, note which messages prompted questions and use that insight to shape future materials.
For your next event, contact Printwell Canada about banner printing. A considered message and a well-prepared display can help your team meet visitors with confidence.
Frequently Asked Questions
How can I design an effective pop-up banner?
Design the banner around one audience and one clear action. For example, a community organization could invite visitors to sign up, while a retailer could point shoppers towards a featured product. Use a strong headline, a relevant image and a short supporting line. Before printing, view the layout at full size and check that the logo, headline and action are easy to distinguish.
How thick is the banner material?
Vinyl banner material is described by weight, with a listed range of 13 to 15 ounces. Weight and thickness are different measures: weight tells you how heavy the material is, while thickness describes how deep it is. Compare material details alongside how the display will be handled. A banner used for frequent travel may have different priorities from one displayed in a permanent retail setting.
What other products work well with a standing banner?
Pair a standing banner with items that help visitors continue the conversation. Business cards keep contact details handy, while custom mugs or promotional pens carry your branding beyond the booth. Matching custom T-shirts can make event staff easier to identify. Choose only the pieces that support the banner’s message and suit the audience.
What types of retractable banners are best for conferences?
The best type depends on where people will approach your display. A single-sided stand suits a booth facing one main aisle; a double-sided model works where attendees pass from several directions. For a speaker session, a banner can identify the room or topic. If your booth needs a continuous background, a full-width backdrop may fit better than a narrow stand.
What are the standard retractable banner sizes in Canada?
A common floor-standing size is about 33 inches wide, with heights of 79 or 81 inches. Standard-width stands range from 23.5 to 33.5 inches, while wider displays range from 47 to 60 inches. Tabletop models run from 11 by 17 inches to 16 by 24 inches. Match the size to your booth footprint, viewing angle and transport space.
What materials and print options are available for retractable banners?
Vinyl is one material used for retractable banner graphics, with a listed weight of 13 to 15 ounces. The right print approach depends on the artwork: a photo-led design needs clear image detail, while a text-led layout relies on contrast and sharp lettering. Ask for the exact printable dimensions before preparing artwork, so important content stays within the visible area.
How do you design an effective retractable conference banner?
Start with the event’s audience, then decide what you want them to understand or do. A professional association could use a session title and speaker name; a product team could feature one benefit and invite visitors to a demonstration. Keep brand colours consistent with other event materials. Review the artwork at full size, checking spelling, contrast and how the message reads from the approach to your booth.
How do you assemble, transport, and store a retractable banner?
Assemble the stand on a clear, level surface, and support the graphic as you raise or lower it. For transport, pack the base and pole with the graphic in its carrying case. Store the display somewhere clean and dry, away from objects that could press against or bend the cassette. Before its next event, check that all parts are together and the graphic rolls smoothly.